QC/T 896-2011 PDF EnglishUS$70.00 · In stock · Download in 9 seconds
QC/T 896-2011: Interface of electrical machine system for electric vehicles Delivery: 9 seconds. True-PDF full-copy in English & invoice will be downloaded + auto-delivered via email. See step-by-step procedure Status: Valid
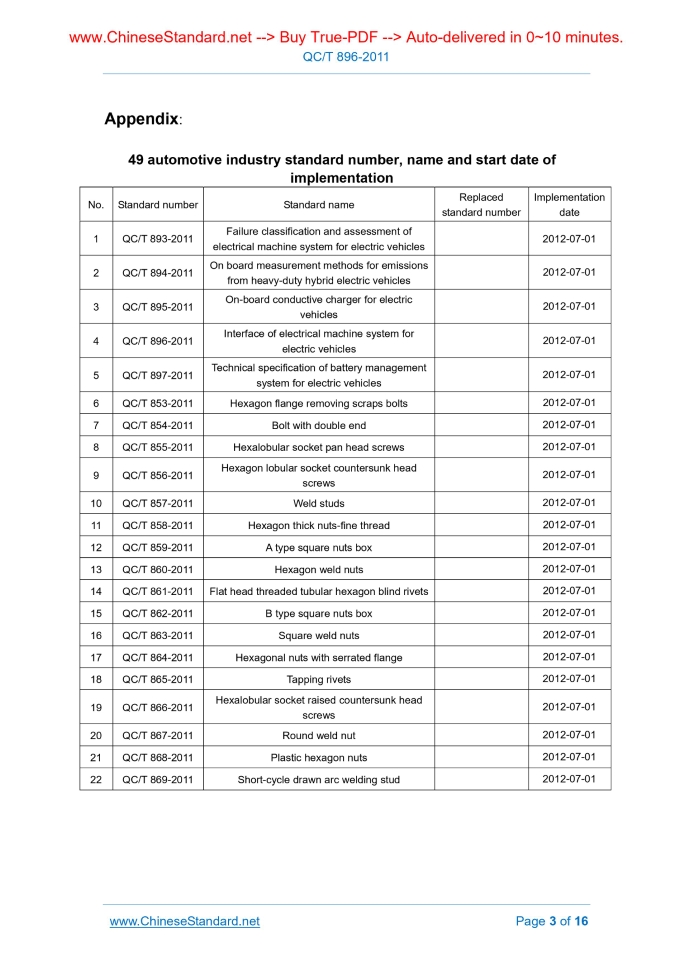
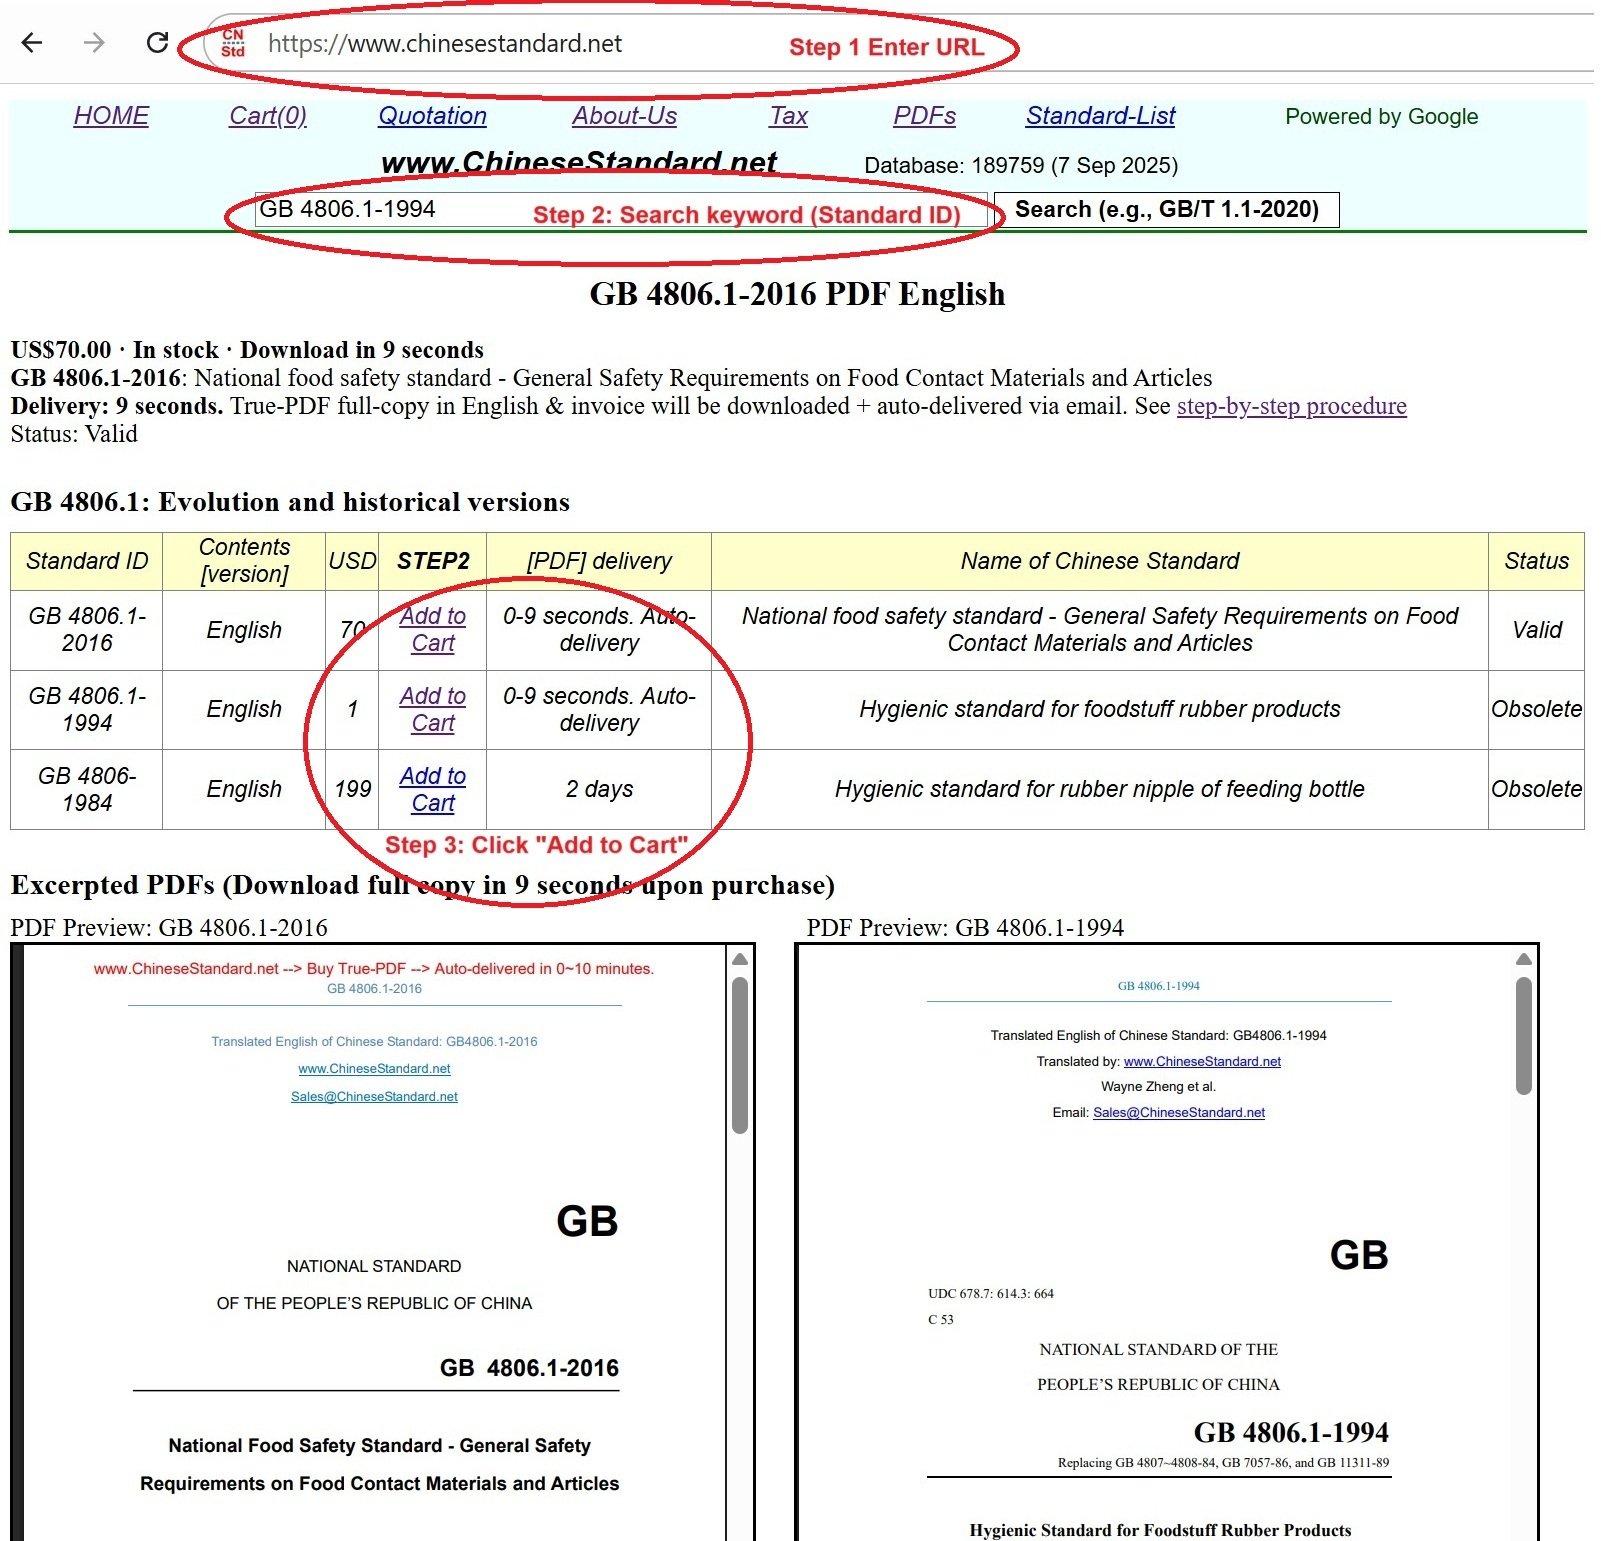
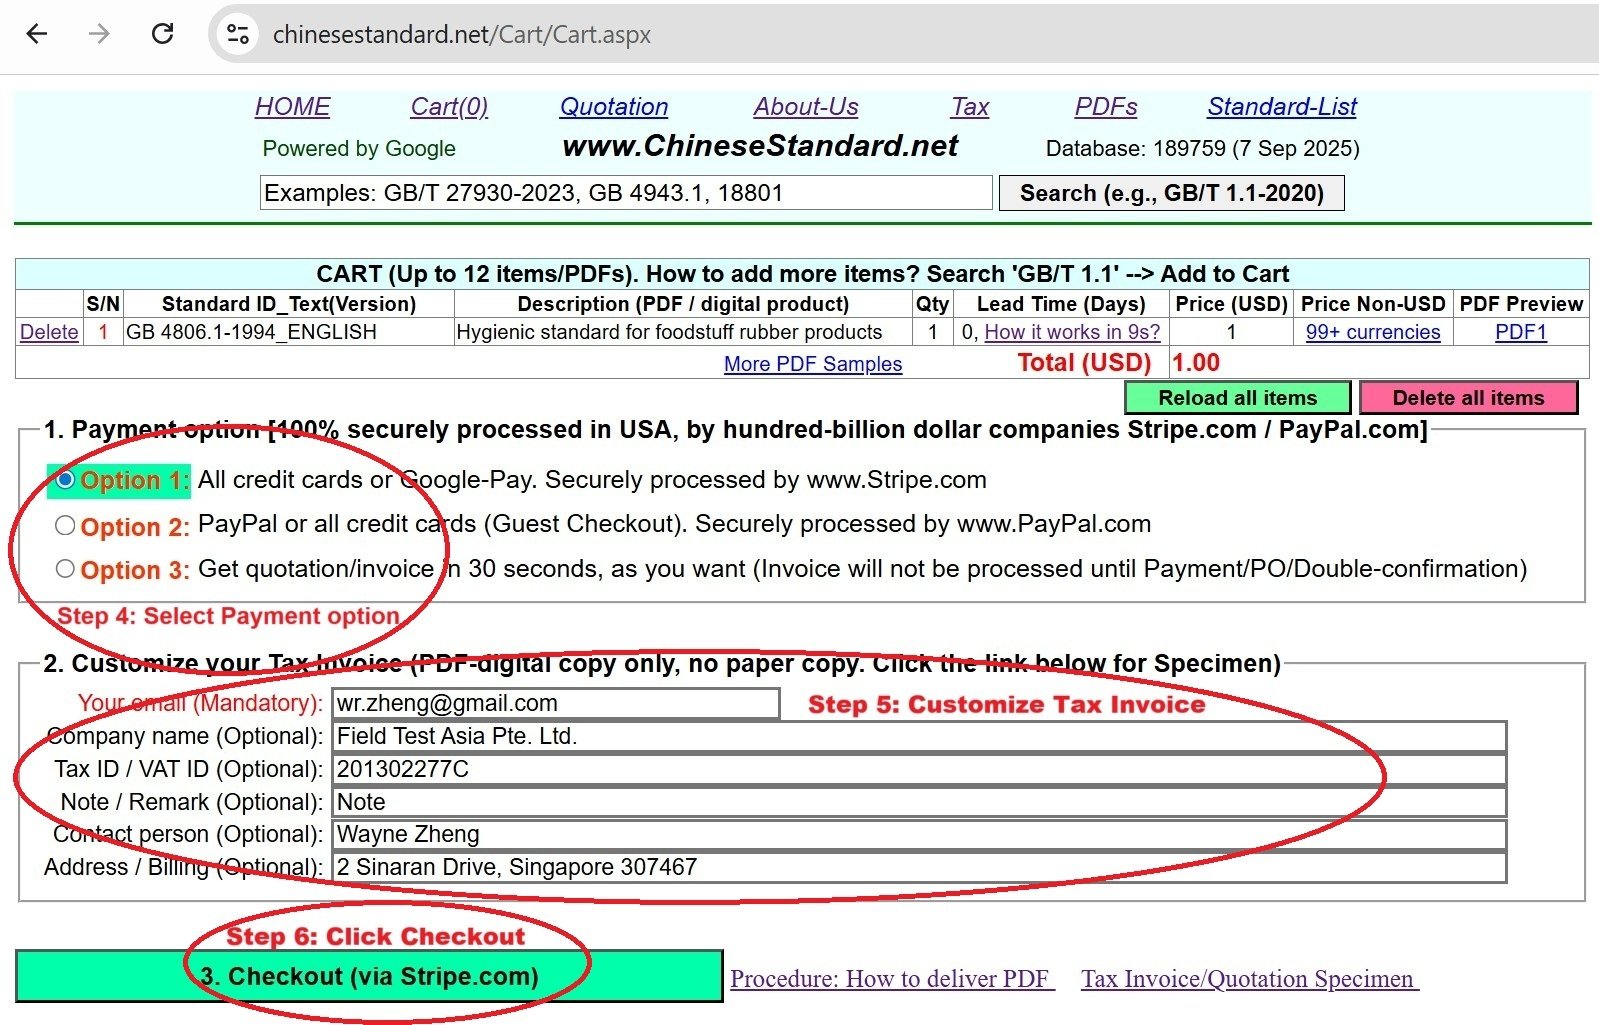
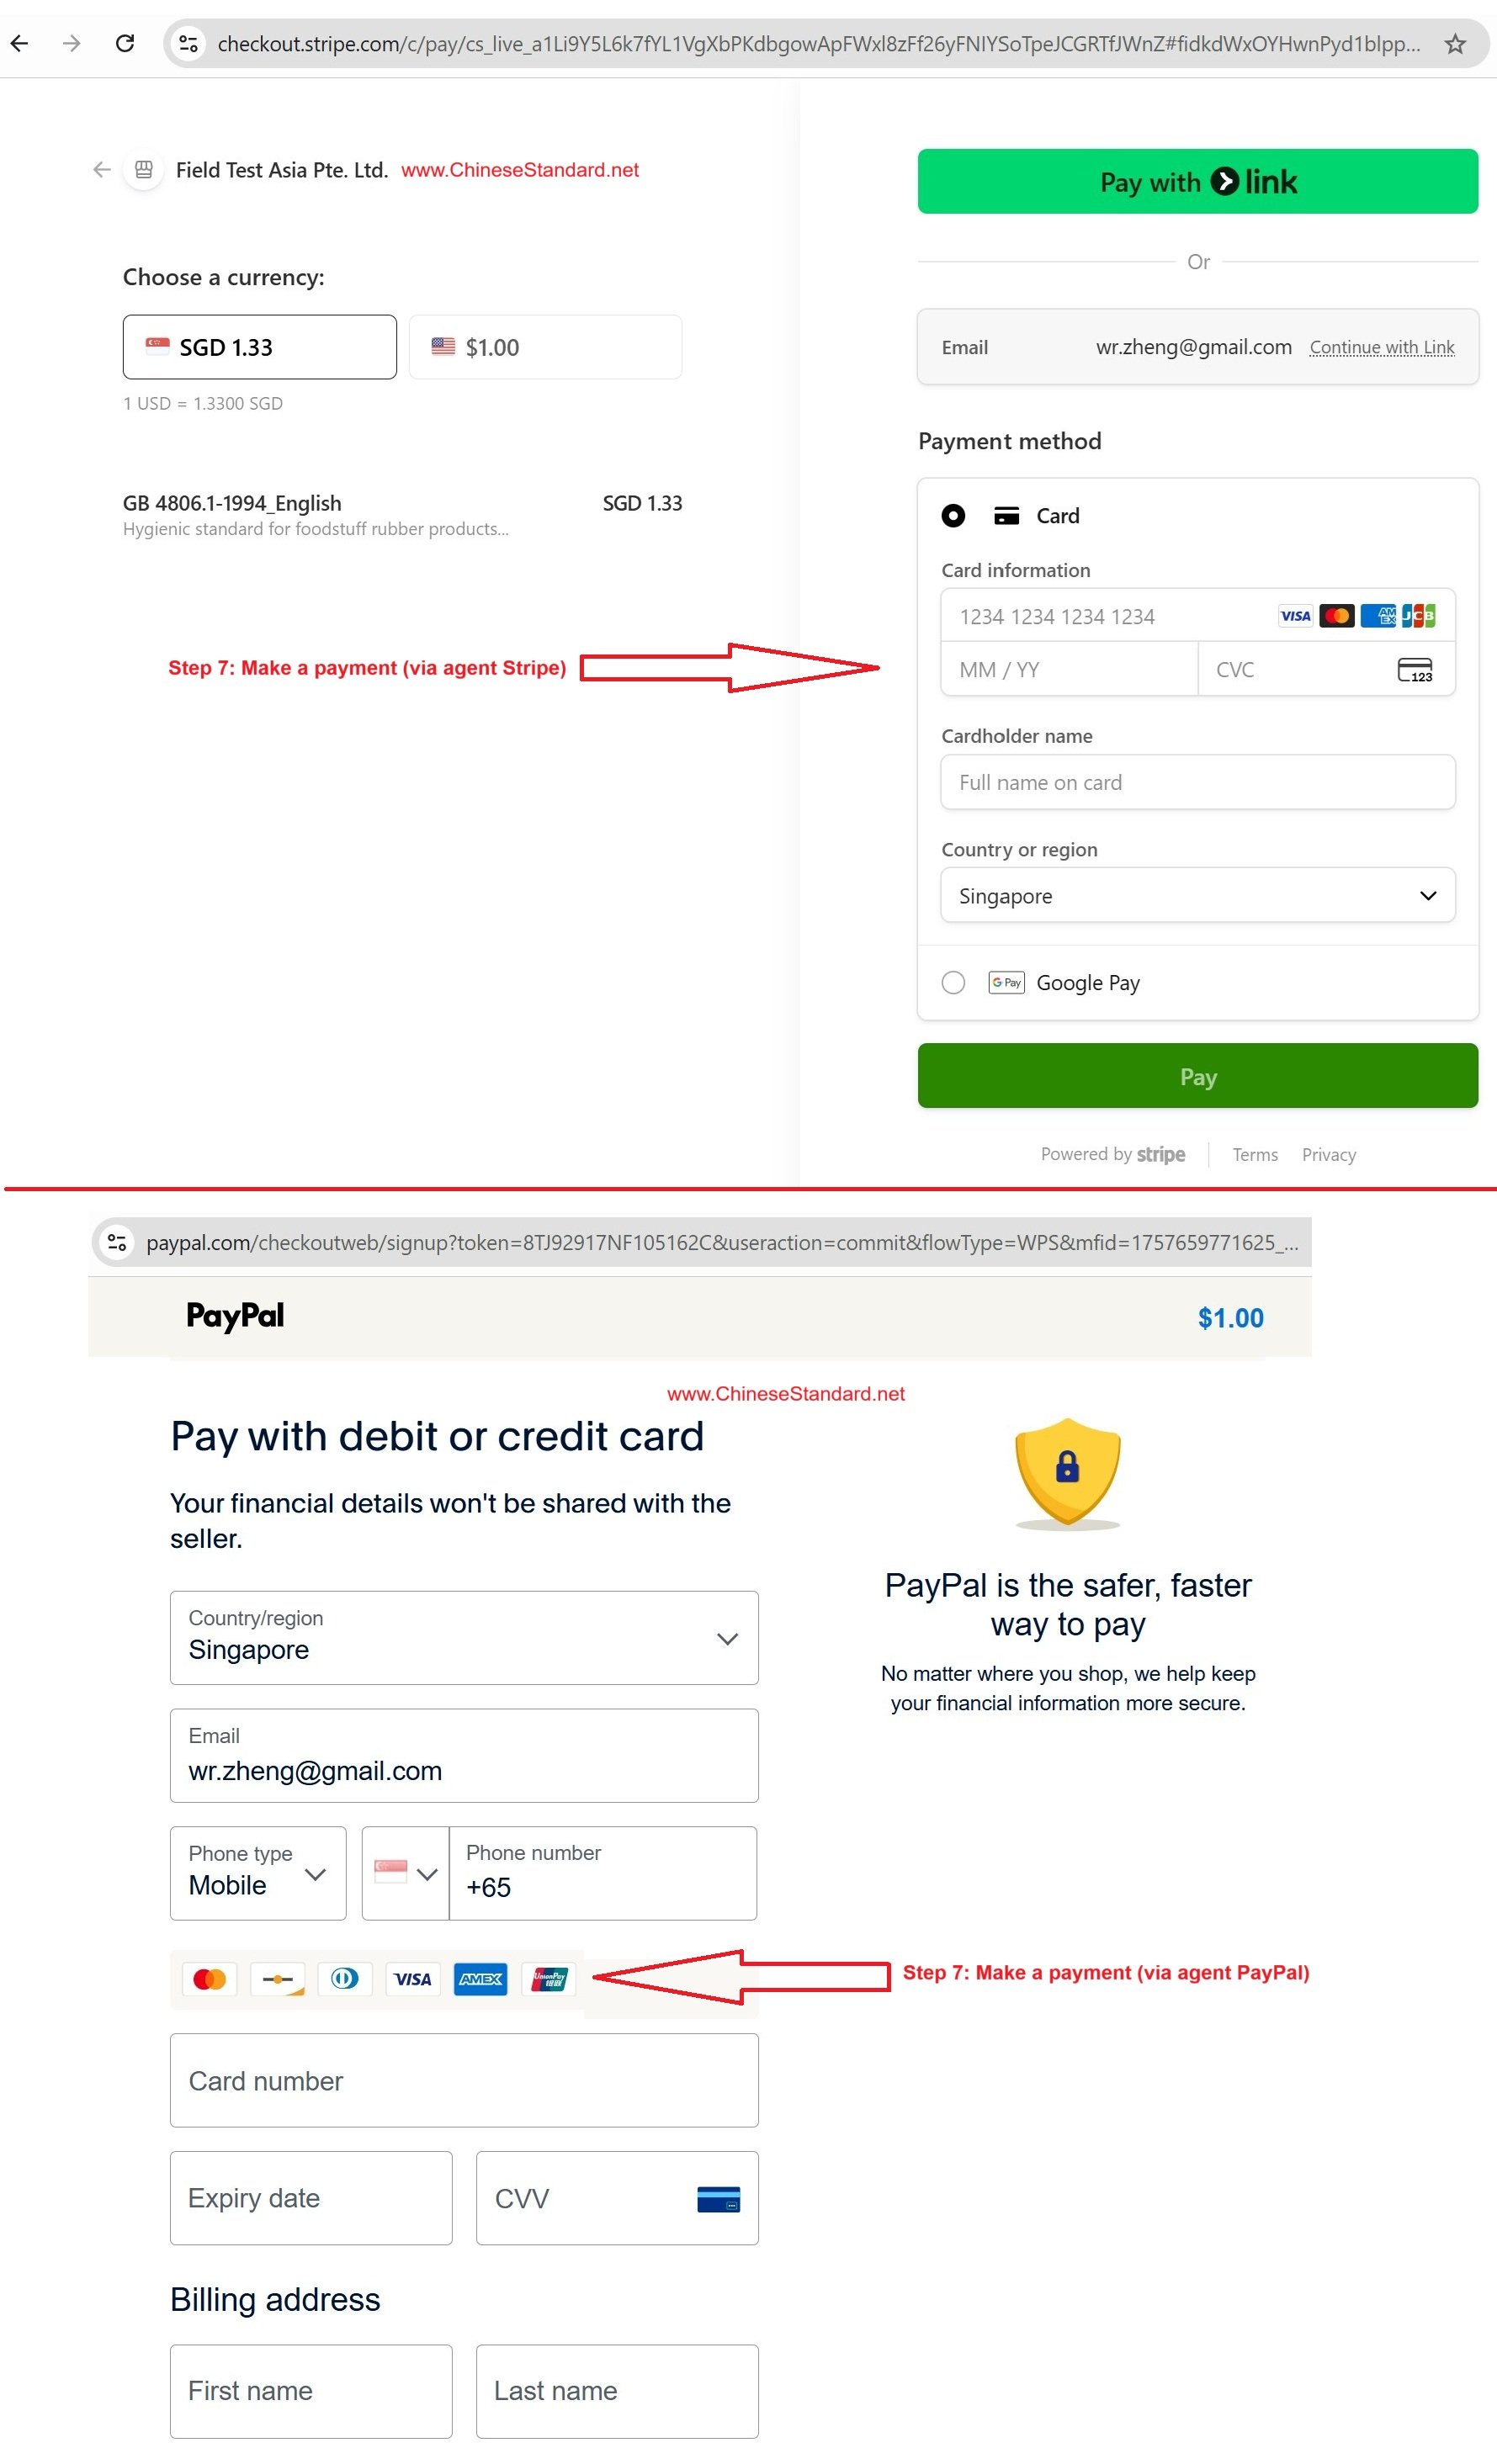
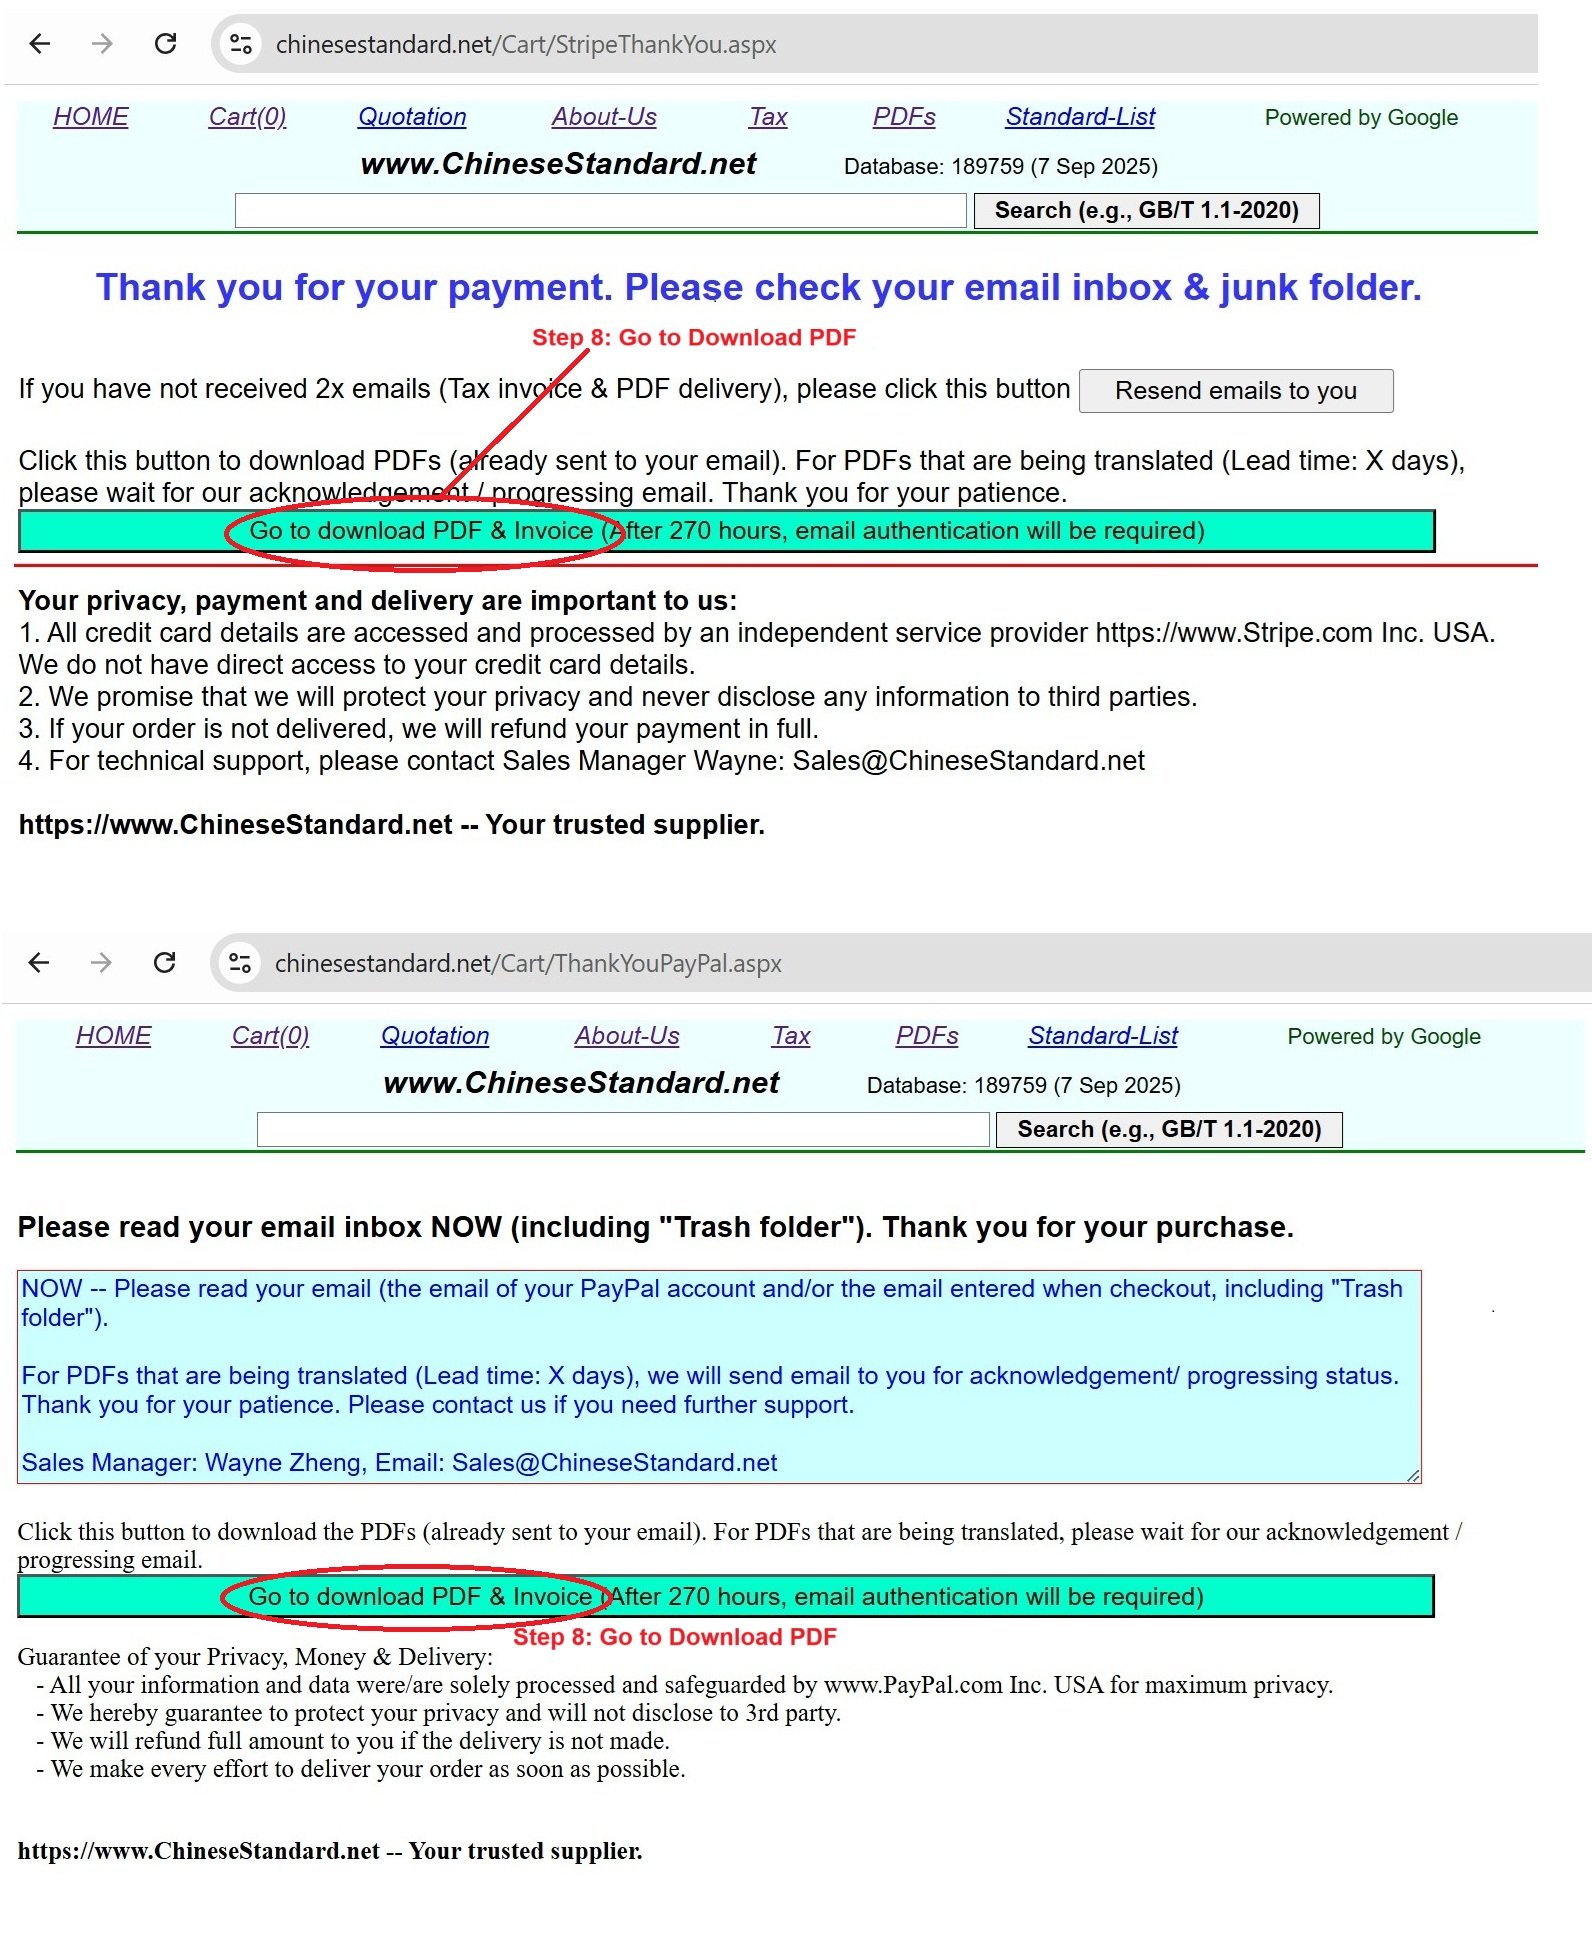
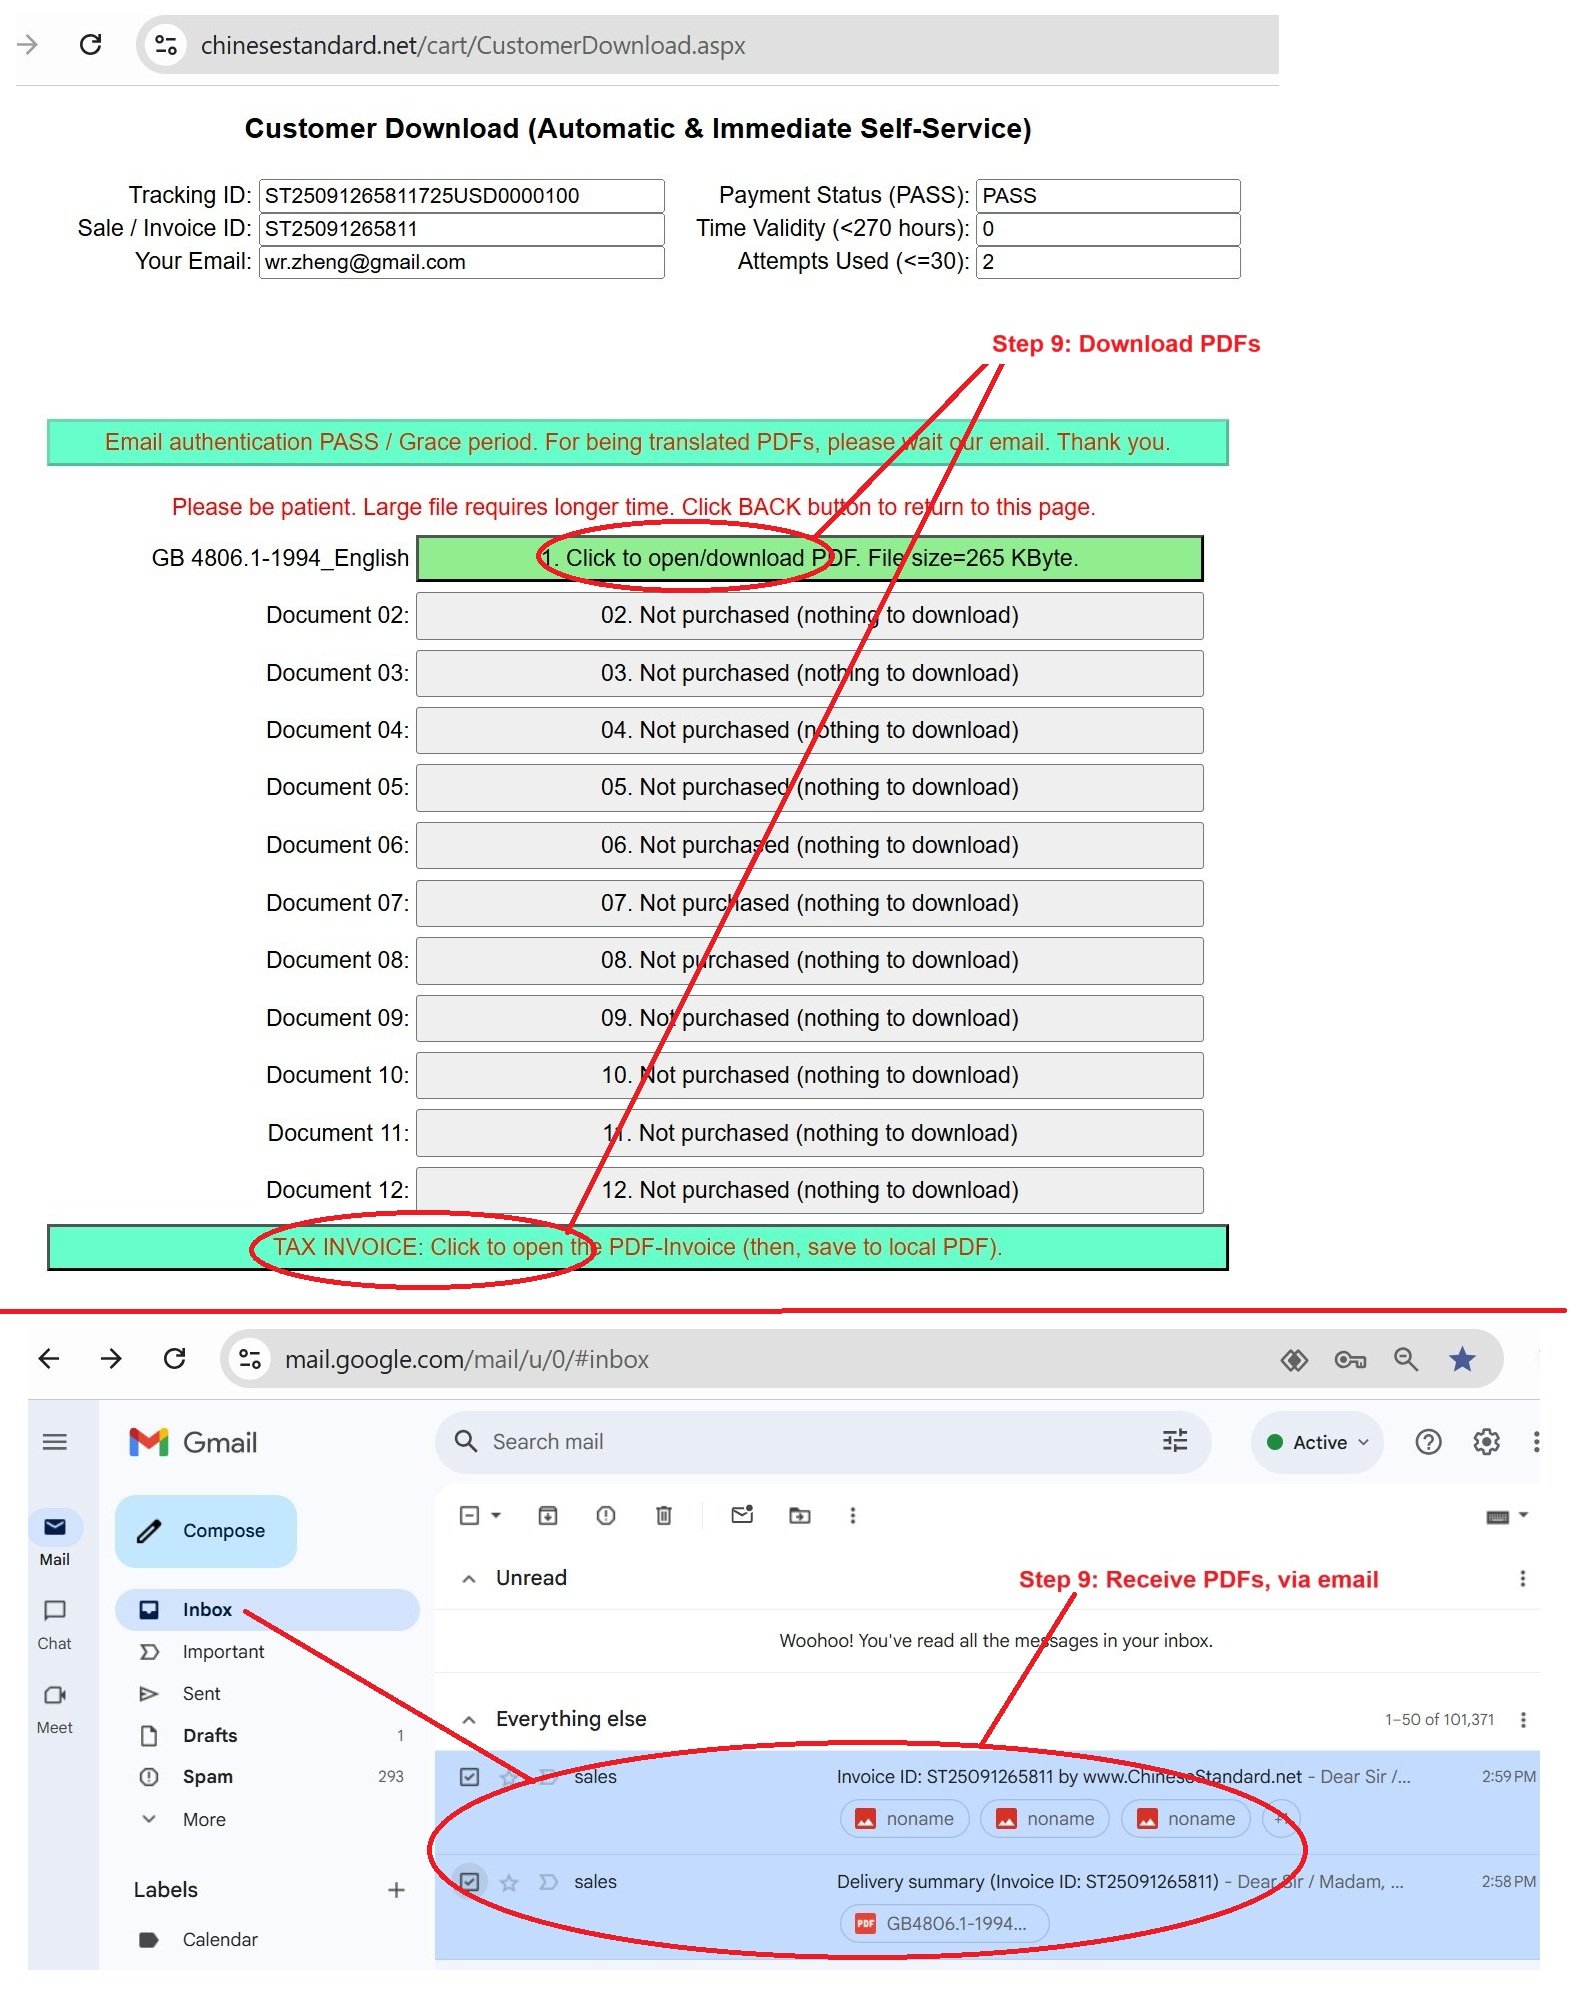
QC/T 896-2011: Interface of electrical machine system for electric vehicles---This is an excerpt. Full copy of true-PDF in English version (including equations, symbols, images, flow-chart, tables, and figures etc.), auto-downloaded/delivered in 9 seconds, can be purchased online: https://www.ChineseStandard.net/PDF.aspx/QCT896-2011ICS 43.040 T 21 QC AUTOMOTIVE INDUSTRY STANDARD OF THE PEOPLE'S REPUBLIC OF CHINA Interface of electrical machine system for electric vehicles Issued on. DECEMBER 20, 2011 Implemented on. JULY 01, 2012 Issued by. Ministry of Industry and Information Technology of the People's Republic of China. Notice of Ministry of Industry and Information Technology of the People's Republic of China 2011 No.43 Table of ContentsForeword... 6 1 Scope... 7 2 Normative references... 7 3 Terms and definitions... 7 4 Connection methods... 8 Appendix A (Informative) Installation dimensions AND installation methods of electrical machine’s control signal connector... 14ForewordThis standard was drafted in accordance with the rules specified in GB/T 1.1-2009. This standard was proposed by AND shall be under the jurisdiction of the National Automotive Standardization Technical Committee (SAC/TC 114). The drafting organizations of this standard. Shanghai Electric Drive Co., Ltd., China Automotive Technology and Research Center, Shanghai Motor Vehicle Testing Center, China Aviation Optoelectronics Technology Co., Ltd., CSR Zhuzhou Electric Locomotive Research Institute Co., Ltd., Beijing Institute of Technology, BAIC Motor New Energy Automotive Co., Ltd., Dongfeng Motor Corporation Technology Center, Zhengzhou Yutong Bus Co., Ltd., Suzhou Green Environmental Protection Technology Co., Ltd. Green. The main drafters of this standard. Gong Jun, Zhang Qin, Meng Xiangfeng, Liu Yanlin, Wu Xueshun, Guo Shuying, Xu Yandong, Song Qiang, Jiang Shijun, Liao Yuefeng, Li Bo, Luo Jianwu, Peng Nengling, Yin Jiatong. Interface of electrical machine system for electric vehicles1 ScopeThis standard specifies the electrical interface type and signal definition of the electrical machine system for electric vehicles, AND provides the general requirements for the mechanical interface of the electrical machine system. This standard is applicable to the electrical machine system for electric vehicles, not applicable to the auxiliary machine system for automotive.2 Normative referencesThe following documents are essential to the application of this document. For the dated documents, only the versions with the dates indicated are applicable to this document; for the undated documents, only the latest version (including all the amendments) are applicable to this Standard. GB/T 11918 Plugs, socket – outlet and couplers for industrial purposes - Part 1.General requirements GB 14711-2006 Safety requirements of small and medium size rotating electrical machines GB/T 18488 General specification of the electrical machines and controllers for electric vehicles GB/T 19596 Terminology of electric vehicles QC/T 417.1 Road vehicles – Connections for on-board electrical wiring harnesses – Part 1.Definitions, test methods and general performance requirements (the automobile part)3 Terms and definitionsThe terms as defined in GB/T 19596, QC/T 417.1 AND the following definitions apply to this standard. 3.1 Electrical interface It refers to the electrical components which are used to connect the electrical machine AND the controller, as well as the Controller AND the complete vehicle, including the power electrical interface AND the signal electrical interface. 3.2 Mechanical interface It refers to the connection components which are used to connect the electrical machine system AND the relevant parts, including the interface between the electrical machine and the transmissions. 3.3 Cooling pipeline interface It refers to the cooling pipeline interface between the electrical machine system AND the complete vehicle.4 Connection methods4.1 Electrical interface 4.1.1 General requirements. The protection against electric shock, grounding measures, enclosure protection class, AND contact resistance, etc, of the electrical interface shall be in accordance with the relevant requirements of GB/T 11918; 4.1.2 Connection method of power electrical interface. The connection methods of power electrical interface include quick connection method and fixed connection method. The quick connection method adopts the quick connector for connection purposes; AND the fixed connection method adopts the connection terminal for connection purposes. 4.1.3 Connection methods of control signal interface. 4.2 Mechanical interface 4.2.1 Installation methods. The installation methods of the electrical machine AND the controller shall be determined by the production unit and the user through negotiation, AND it shall satisfy the shaking resistance AND the protection requirements of complete vehicle. 4.3 Cooling pipeline connection Transmission torque (N•m) Modulus (mm) Number of teeth Pitch circle diameter (mm) Pressure angle (o) As for the electrical machine AND the controller using coolant, it shall, in accordance with Table 8, select the coolant interface.Appendix A(Informative) Installation dimensions AND installation methods of electrical machine’s control signal connector A.1 Installation dimensions AND installation methods of 12-core electrical machine’s control signal connector The installation dimensions AND installation methods of 12-core electrical machine’s control signal connector shall be in accordance with the provisions of Figure A.1. ......Source: Above contents are excerpted from the full-copy PDF -- translated/reviewed by: www.ChineseStandard.net / Wayne Zheng et al. Tips & Frequently Asked Questions:Question 1: How long will the true-PDF of English version of QC/T 896-2011 be delivered?Answer: The full copy PDF of English version of QC/T 896-2011 can be downloaded in 9 seconds, and it will also be emailed to you in 9 seconds (double mechanisms to ensure the delivery reliably), with PDF-invoice.Question 2: Can I share the purchased PDF of QC/T 896-2011_English with my colleagues?Answer: Yes. The purchased PDF of QC/T 896-2011_English will be deemed to be sold to your employer/organization who actually paid for it, including your colleagues and your employer's intranet.Question 3: Does the price include tax/VAT?Answer: Yes. Our tax invoice, downloaded/delivered in 9 seconds, includes all tax/VAT and complies with 100+ countries' tax regulations (tax exempted in 100+ countries) -- See Avoidance of Double Taxation Agreements (DTAs): List of DTAs signed between Singapore and 100+ countriesQuestion 4: Do you accept my currency other than USD?Answer: Yes. www.ChineseStandard.us -- QC/T 896-2011 -- Click this link and select your country/currency to pay, the exact amount in your currency will be printed on the invoice. Full PDF will also be downloaded/emailed in 9 seconds.How to buy and download a true PDF of English version of QC/T 896-2011?A step-by-step guide to download PDF of QC/T 896-2011_EnglishStep 1: Visit website https://www.ChineseStandard.net (Pay in USD), or https://www.ChineseStandard.us (Pay in any currencies such as Euro, KRW, JPY, AUD).Step 2: Search keyword "QC/T 896-2011". Step 3: Click "Add to Cart". If multiple PDFs are required, repeat steps 2 and 3 to add up to 12 PDFs to cart. Step 4: Select payment option (Via payment agents Stripe or PayPal). Step 5: Customize Tax Invoice -- Fill up your email etc. Step 6: Click "Checkout". Step 7: Make payment by credit card, PayPal, Google Pay etc. After the payment is completed and in 9 seconds, you will receive 2 emails attached with the purchased PDFs and PDF-invoice, respectively. Step 8: Optional -- Go to download PDF. Step 9: Optional -- Click Open/Download PDF to download PDFs and invoice. See screenshots for above steps: Steps 1~3 Steps 4~6 Step 7 Step 8 Step 9 |